 Save
Save I was standing barefoot on warm grass at a backyard cookout when someone handed me an ear of corn still steaming from the pot. The butter melted instantly, pooling in the ridges between kernels, and I took that first bite standing right there by the picnic table. That sweet snap, the way the juice ran down my wrist—it was summer in a single moment. I've made corn on the cob a hundred times since, but I still think about that afternoon whenever the first ears show up at the market.
One July evening, I boiled a dozen ears for a last-minute dinner on the porch. My neighbor wandered over, drawn by the smell of butter and salt, and we ended up eating corn and telling stories until the fireflies came out. There was no fancy main course, no dessert—just corn, cold drinks, and the kind of easy conversation that happens when your hands are busy and your guard is down. That night taught me that the simplest food often makes the best memories.
Ingredients
- 4 ears fresh corn on the cob, husked: Look for ears with bright green husks and moist silk—the kernels should feel plump when you press gently through the husk, and avoid any with dry or brown tips.
- 2 tablespoons unsalted butter, softened: Softened butter spreads easily over hot corn and melts into every crevice, while unsalted lets you control the seasoning yourself.
- 1 teaspoon sea salt (or to taste): Sea salt has a clean, bright flavor that doesn't overpower the corn's natural sweetness, and you can always add more at the table.
Tired of Takeout? 🥡
Get 10 meals you can make faster than delivery arrives. Seriously.
One email. No spam. Unsubscribe anytime.
Instructions
- Boil the Water:
- Fill a large pot with enough water to cover the corn completely and set it over high heat until it reaches a rolling boil. You'll know it's ready when bubbles break the surface rapidly and steam rises in a steady cloud.
- Cook the Corn:
- Lower the husked ears into the boiling water using tongs, then let them cook for 5 to 7 minutes until the kernels turn a vibrant yellow and yield slightly when pressed. For grilling, brush each ear lightly with oil and turn every few minutes over medium-high heat for 10 to 12 minutes, watching for those beautiful char marks.
- Drain and Dry:
- Lift the corn out of the pot with tongs and give each ear a gentle shake to release excess water. If you grilled them, just transfer straight to your serving platter.
- Butter and Season:
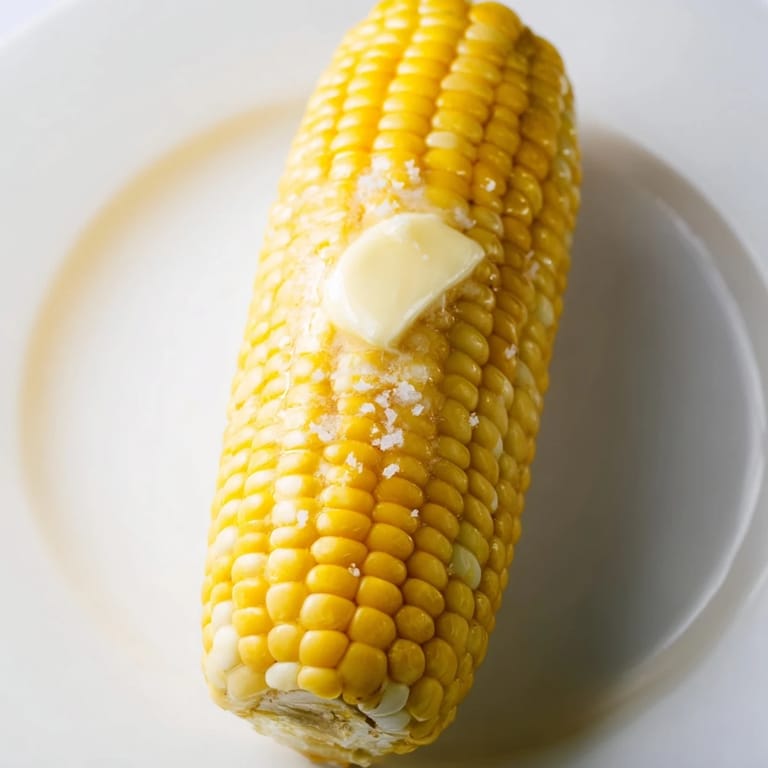
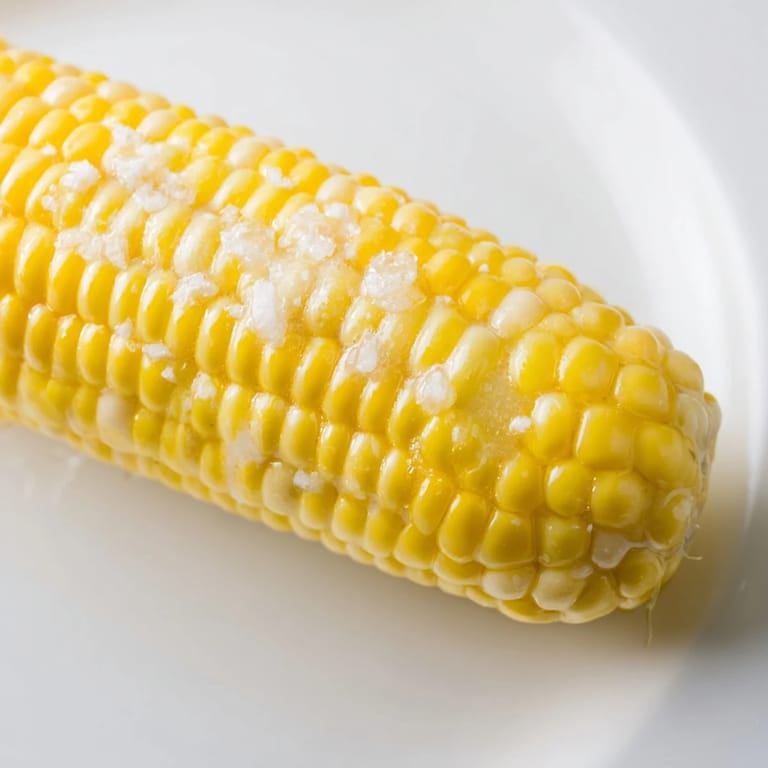
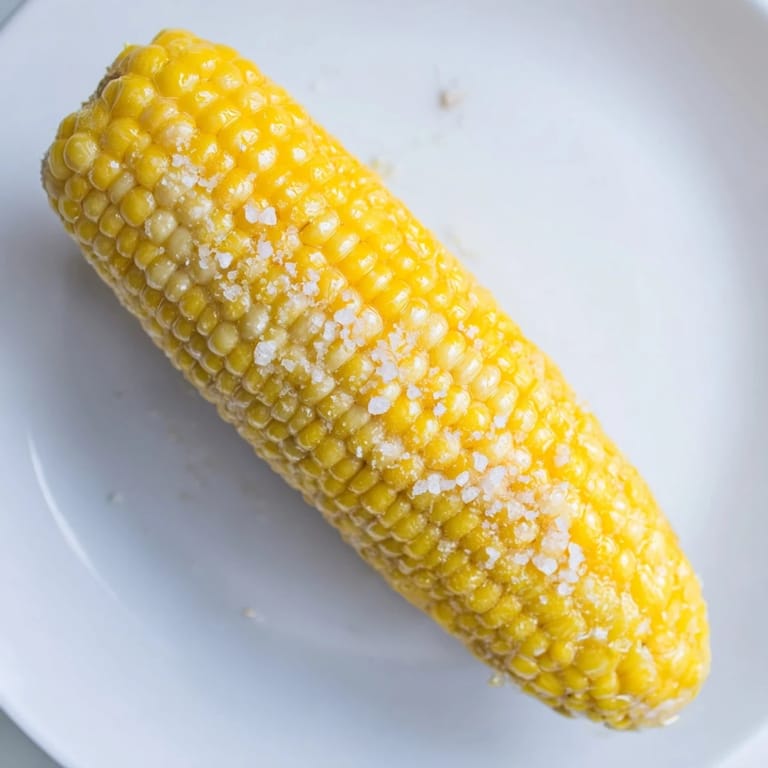
- While the corn is still steaming hot, spread softened butter generously over each ear, working it into the rows of kernels, then sprinkle with sea salt to taste. The heat will melt the butter instantly, so work quickly and don't be shy with either.
- Serve Immediately:
- Bring the corn to the table while it's still warm and let everyone dig in. The first few minutes are when the flavor is brightest and the butter is at its melty best.
 Save
Save I remember watching my niece tackle her first ear of corn at a family reunion. She held it with both hands, butter smeared across her cheeks, giggling every time a kernel stuck to her nose. My brother-in-law leaned over and said, This is what summer tastes like, kiddo. She nodded, mouth too full to answer, and went right back to gnawing. That image—her joy, the mess, the pure uncomplicated pleasure—is what I think of every time I pull out the big pot.
Flavor Variations to Try
After you butter and salt the corn, dust it with smoked paprika and a handful of grated Parmesan for a smoky, savory twist. Or go the Mexican street corn route by squeezing fresh lime over each ear and shaking on chili powder and a pinch of cotija cheese. I once rolled hot corn in melted garlic herb butter and chopped parsley, and it disappeared faster than anything else on the table.
Keeping It Warm
If you're cooking for a crowd or need to prep ahead, wrap each cooked ear tightly in aluminum foil right after buttering. The foil traps the steam and keeps the corn hot and moist for up to 20 minutes, which is just enough time to finish grilling the burgers or tossing the salad. I've used this trick at potlucks more times than I can count, and the corn always comes out of the foil tasting like it just left the pot.
Serving Suggestions
Corn on the cob belongs next to grilled chicken, barbecue ribs, or a big platter of pulled pork. It also pairs beautifully with coleslaw, potato salad, and baked beans for a classic summer spread. On lazy nights, I've served it alongside a simple green salad and called it dinner.
- Set out extra butter and a few different salts—flaky sea salt, garlic salt, or even a flavored finishing salt—and let everyone customize their own.
- Keep a bowl of lime wedges and hot sauce on the table for anyone who wants to kick things up a notch.
- Have plenty of napkins ready, because no matter how careful people try to be, corn on the cob is deliciously messy.
 Save
Save There's nothing fancy about corn on the cob, and that's exactly why it works. It's summer on a plate, simple and sweet, and every bite reminds you that the best food doesn't need much fuss.
Recipe Questions & Answers
- → What is the best method to cook corn on the cob?
Both boiling and grilling work well. Boiling retains moisture for tender kernels, while grilling adds a smoky charred flavor.
- → How long should I boil corn on the cob?
Boil corn for 5 to 7 minutes until the kernels are bright yellow and tender.
- → Can I prepare corn on the cob ahead of time?
Yes, after cooking, keep corn warm by wrapping it in foil. This helps retain heat without drying it out.
- → What toppings complement buttered corn best?
Simple sea salt works great, but smoked paprika, grated Parmesan, or fresh herbs add delicious flavor variations.
- → Are there dairy-free options for butter on corn?
Yes, plant-based butter substitutes provide a dairy-free alternative while maintaining creamy richness.